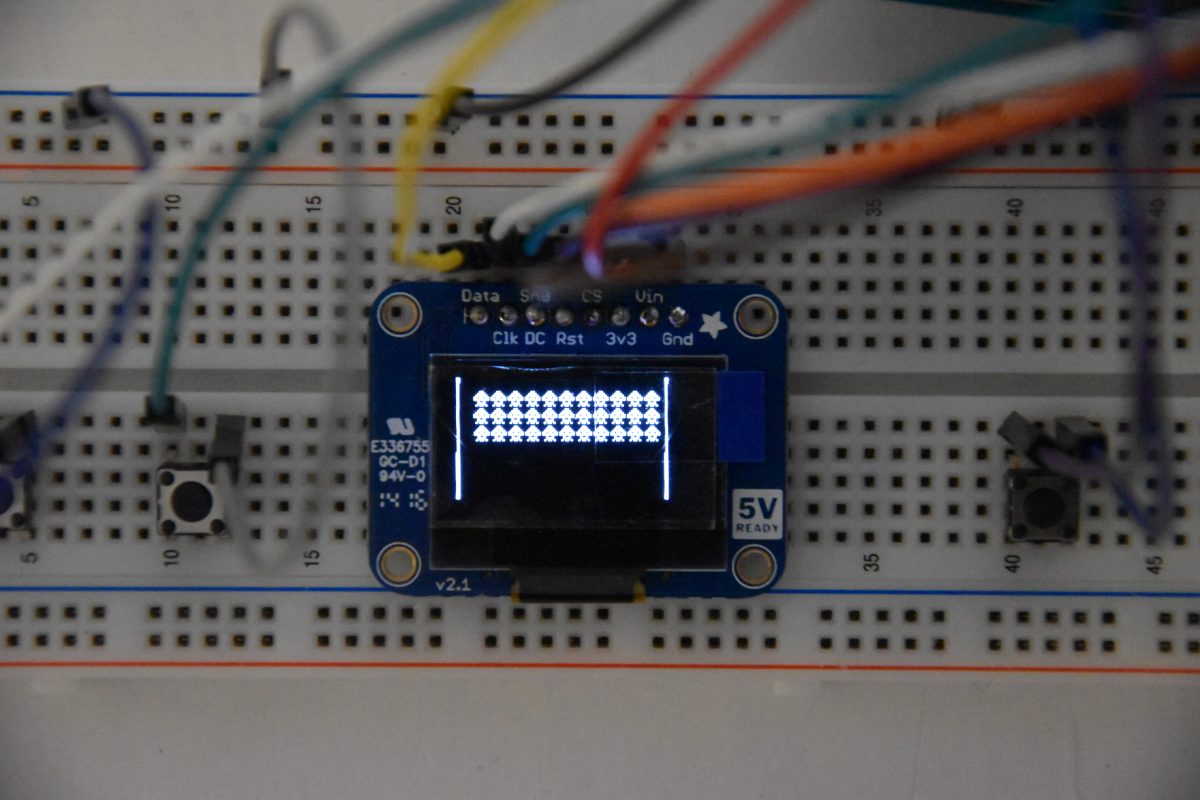
I’m currently working on an Arduino Space Invaders Game using a 0.96″ OLED as display.
In this post you will find a list of the parts I’m using for this project. I will also show you both an illustration and the schematics for the first prototype.
If you haven’t already, you might also like to read the first dev log about the project, where I give an introduction to the project and the project scope.
Parts used for my Arduino Space Invaders Game
I used the following parts for the first prototype
- Arduino Uno
- Monochrome 0.96″ 128×64 OLED from Adafruit
- 3 x tactile switch buttons (6 mm)
- Jumper wires
- Large breadboard
- USB data cable
Schematics and Illustration of setup
Below is both an illustration and the schematics for the prototype.
To the left of the OLED display is the left (L) and right (R) buttons. And to the right is the Action (A) button.
I’m using the built-in pullup resistors for the buttons. This is why each button is connected to a digital pin and ground.
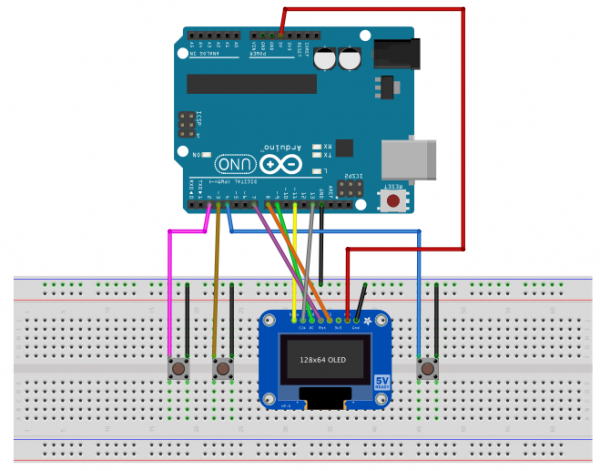
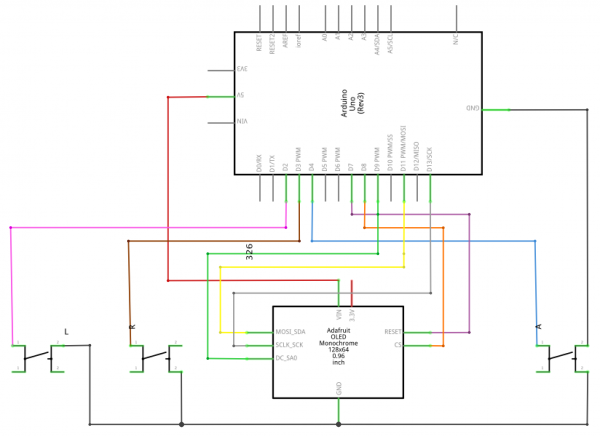
The digital pins used for the buttons are:
- Pin 2: Left button
- Pin 3: Right button
- Pin 4: Action button
And the Arduino Uno communicates with the OLED using hardware SPI using the following pins:
- Pin 7: CS
- Pin 8: RESET
- Pin 9: DC
- Pin 11: DATA
- Pin 13: CLK
External libraries
You’ll need the following two libraries to connect to the OLED:
The SSD1306 library is made for the OLED and it dependent of the GFX library.
Test the setup
To test that all the connections are setup correctly you might want to try out the following:
- Setup the OLED using the Adafruit_SSD1306 class. For hardware SPI you should use the constructor that only requires three parameters (OLED_DC, OLED_RESET, OLED_CS). You also have to specify the screen size (128×64) in the header file for the Adafruit_AAD1306 class (for more info take a look at Adafruit own tutorial for the OLED display). Verify that you can write something to the screen
- Test the button circuits. Remember to set the pinMode for the three button pins to INPUT_PULLUP. Note than because we use INPUT_PULLUP, the digitalRead(pin) function will return 0 when the pin is pressed and 1 when it is not.
My final version
For my final version I have moved the OLED and the buttons from the breadboard and onto an Arduino Uno proto shield.
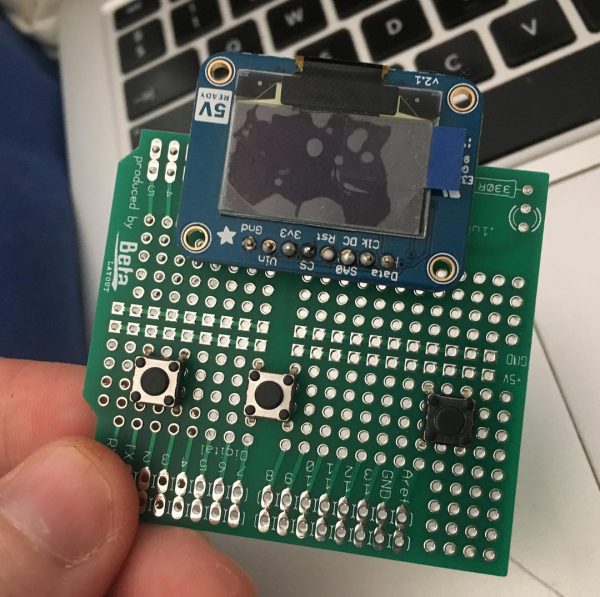
I had initially planned to use an Adafruit Trinket Pro instead of the Uno to make a slimmer finished system. But then I found this proto shield that I got for free at Berlin Maker Faire last year and figured I might as well make use of it.
My final system then ended up looking as below. However, before I consider the project completely finished, I also want to design and print a 3D casing for it.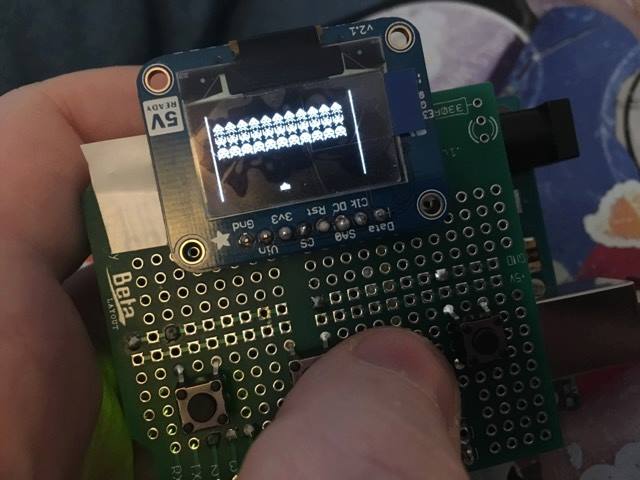
I’m currently using 4 AA batteries to power the Arduino Space Invaders Game System. You can buy different battery holders which are perfect for the project.
But I used a 3D printed battery holder instead, which I already had lying around. The STL files can be found here on Thingiverse.
The next dev log will start discussing the software side of the project. I’ll start explaining the overall structure of the code and what why I’m doing it the way I am.
Later posts will then be mainly about specific programming challenges such as how the Invaders are moved, how to add explosion animations etc.
/Signe

