
I recently rediscovered my Arduboy, and quickly decided to make a few little games for it and document the development process.
My main motivation is to have a small side project that is not too complicated (initially at least 😉 ) and to experiment with a few new coding styles/patterns. You can always find the newest public version of my source code for these projects here on GitHub.
The first game I’m making is a simple Memory Game. I’m using this game to setup the basics of my ‘engine’ and to re-familiarize myself with the Arduboy library. The public version of the source code for this Memory Game will be updated here on GitHub.
Arduboy Memory Game Setup
Setting up the basics for the game includes the following:
- Create a new Arduino Sketch for the game
- Create a wrapper interface called Device for interaction with the Arduboy
- Creating a Vector struct to be used for positions, sizes etc.
- Drawing a game board of 6 x 4 squares
Create a new Arduino Sketch for the game
If you are unsure on how to do this, or if you have installed all the libraries used for developing games for the Arduboy, I suggest you look at the post ‘Make Your Own Arduboy Game: Part 1 – Setting Up Your Computer‘ at the Arduboy community forum.
Create a wrapper interface called Device for interaction with the Arduboy
I don’t want to write all my game code in one big single .ino file.
Instead I will separate the code into several header files (.hpp) and implementation files (.cpp). This will hopefully make the code easier to manage in the long run.
I start by creating a wrapper interface called Device for the Arduboy. In the header file (Device.hpp) I declare the functions I’m going to use and in Device.cpp I will write the implementation of the functions. I will also declare and instantiate an instance of the Arduboy2 class in the .cpp file.
Creating a Vector struct to be used for positions, sizes etc.
In my experience, games are always filled with positions, sizes and similar. So I decided to make a Vector struct right from the start.
To make the code easier to read, I also use type alias declaration to make Position a synonym for Vector. I will then use the Position name whenever I need a vector representing a position.
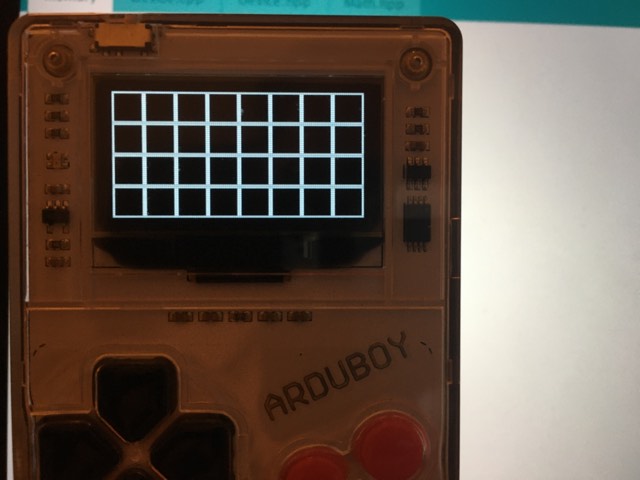
Drawing a game board of 6 x 4 squares
Finally I also wanted to get something on screen, which sort of gives an idea of how the game will look like.
I want to have as many game cards on screen as possible. But I also want to make room for some sort of timer or scoring. I have also decided that each game card will be displayed using 16 x 16 pixels.
For now I’ve decided to create a board of 6 x 4 game cards. When their picture is turned down, they will each be visualized by a 16 x 16 square.
To do this I added the function ‘setSquare(Vector pos)’ to my Device interface. In this function the color and size of the squares are defined.
For this version I then draw the squares in the loop function in the .ino file using two simple for loops.
void loop() {
  clearScreen();
  for(int x = 0; x < 6; ++x){
    for(int y = 0; y < 4; ++y){
        setSquare(Vector(x, y));
    }
  }
  draw();
}
I will probably move the main game loop into another files at a later point.
Finding the code for this dev log
As written earlier, you can find the source code for this project here on GitHub.
If you only want the code specific for this dev log, you will find it in on the branch ‘1GettingStarted’.
That was it for this time.
For next time I’m planning to add sprites to the game.
/Signe
Comments
3 responses to “Arduboy Memory Game #1: Getting started”
[…] the last dev log, I started the project for my little Arduboy Memory […]
[…] Getting Started […]
[…] Getting Started […]